README.md
In shinipsum: Lorem-Ipsum-Like Helpers for Fast Shiny Prototyping
shinipsum 
The goal of {shinipsum}is to provide random shiny elements for easiest
shiny app prototyping, so that you can focus on building the frontend
before building the backend.
The full documentation can be found on the {pkgdown}site:
https://thinkr-open.github.io/shinipsum/
Installation
You can install the dev version of shinipsum from GitHub with:
install.packages("shinipsum")
About
You’re reading the doc about version : 0.1.1
This README has been compiled on the
Sys.time()
#> [1] "2024-02-09 15:35:39 CET"
Here are the test & coverage results :
devtools::check(quiet = TRUE)
#> ℹ Loading shinipsum
#> ── R CMD check results ──────────────────────────────────── shinipsum 0.1.1 ────
#> Duration: 17.1s
#>
#> 0 errors ✔ | 0 warnings ✔ | 0 notes ✔
covr::package_coverage()
#> shinipsum Coverage: 97.91%
#> R/example.R: 44.44%
#> R/Table.R: 96.97%
#> R/Plot.R: 99.29%
#> R/DataTable.R: 100.00%
#> R/dygraphs.R: 100.00%
#> R/Image.R: 100.00%
#> R/LinearModel.R: 100.00%
#> R/Print.R: 100.00%
#> R/Text.R: 100.00%
#> R/utils.R: 100.00%
Demo
Available examples:
library(shinipsum)
ipsum_examples()
#> [1] "01_navbar.R"
You can run {shinipsum} demos with:
shiny::runApp(
  ipsum_examples("01_navbar.R")
)
Available ipsums :
Note: {shinipsum} only load functions which are necessary to its
internal job. If you want to customise an output or to use a renderXX
/ XXOutput, you’ll need to explicitely load the packages needed
(for example, if you want to customise a dygraph, a ggplot, or use
ggplotly).
DataTable
random_DT takes 4 args :
nrow & ncol: number of row and columns of the tabletype : random, numeric, character, numchar - the type of the columns... : args to be passed to DT::datatable
Image
random_image returns a random image.
Plot
random_ggplot takes one arg :
type : Can be any of “random”, “point”, “bar”, “boxplot”,“col”,
“tile”, “line”, “bin2d”, “contour”, “density”, “density_2d”,
“dotplot”, “hex”, “freqpoly”, “histogram”, “ribbon”, “raster”, “tile”,
“violin” and defines the geom of the ggplot. Default is “random”, and
chooses a random geom for you.
Default theme is minimal.
As the return object is a ggplot, it can be enhanced like any other
ggplot with +.
library(ggplot2)
random_ggplot(type = "col") +
  labs(title = "Random plot") +
  theme_bw()
random_ggplotly calls the ggplotly function on a random_ggplot.
Dygraph
random_dygraph returns a random dygprah. It takes one arg:
...: arguments which are passed to the dygraph() function.
As the return object is a dygraph, it can be enhanced like any other
dygraph.
library(dygraphs)
random_dygraph()  %>%
  dyRangeSelector()
Print
random_print takes one arg:
type: can be any of "character", "numeric", "model", "table", and
defines the type of print. Default is "character".
Table
random_table takes three args : nrow, ncols and type. See
random_DT.
Text
random_text takes one of these two args:
nchar: lorem ipsum of nchar charactersnwords: lorem ipsum of nwords charactersoffset: number of characters or words to offset the result by
Lm
random_lm returns a random lm model output:
nobs: Number of observationsnx: Number of variables (should be lower than nobs)
Example
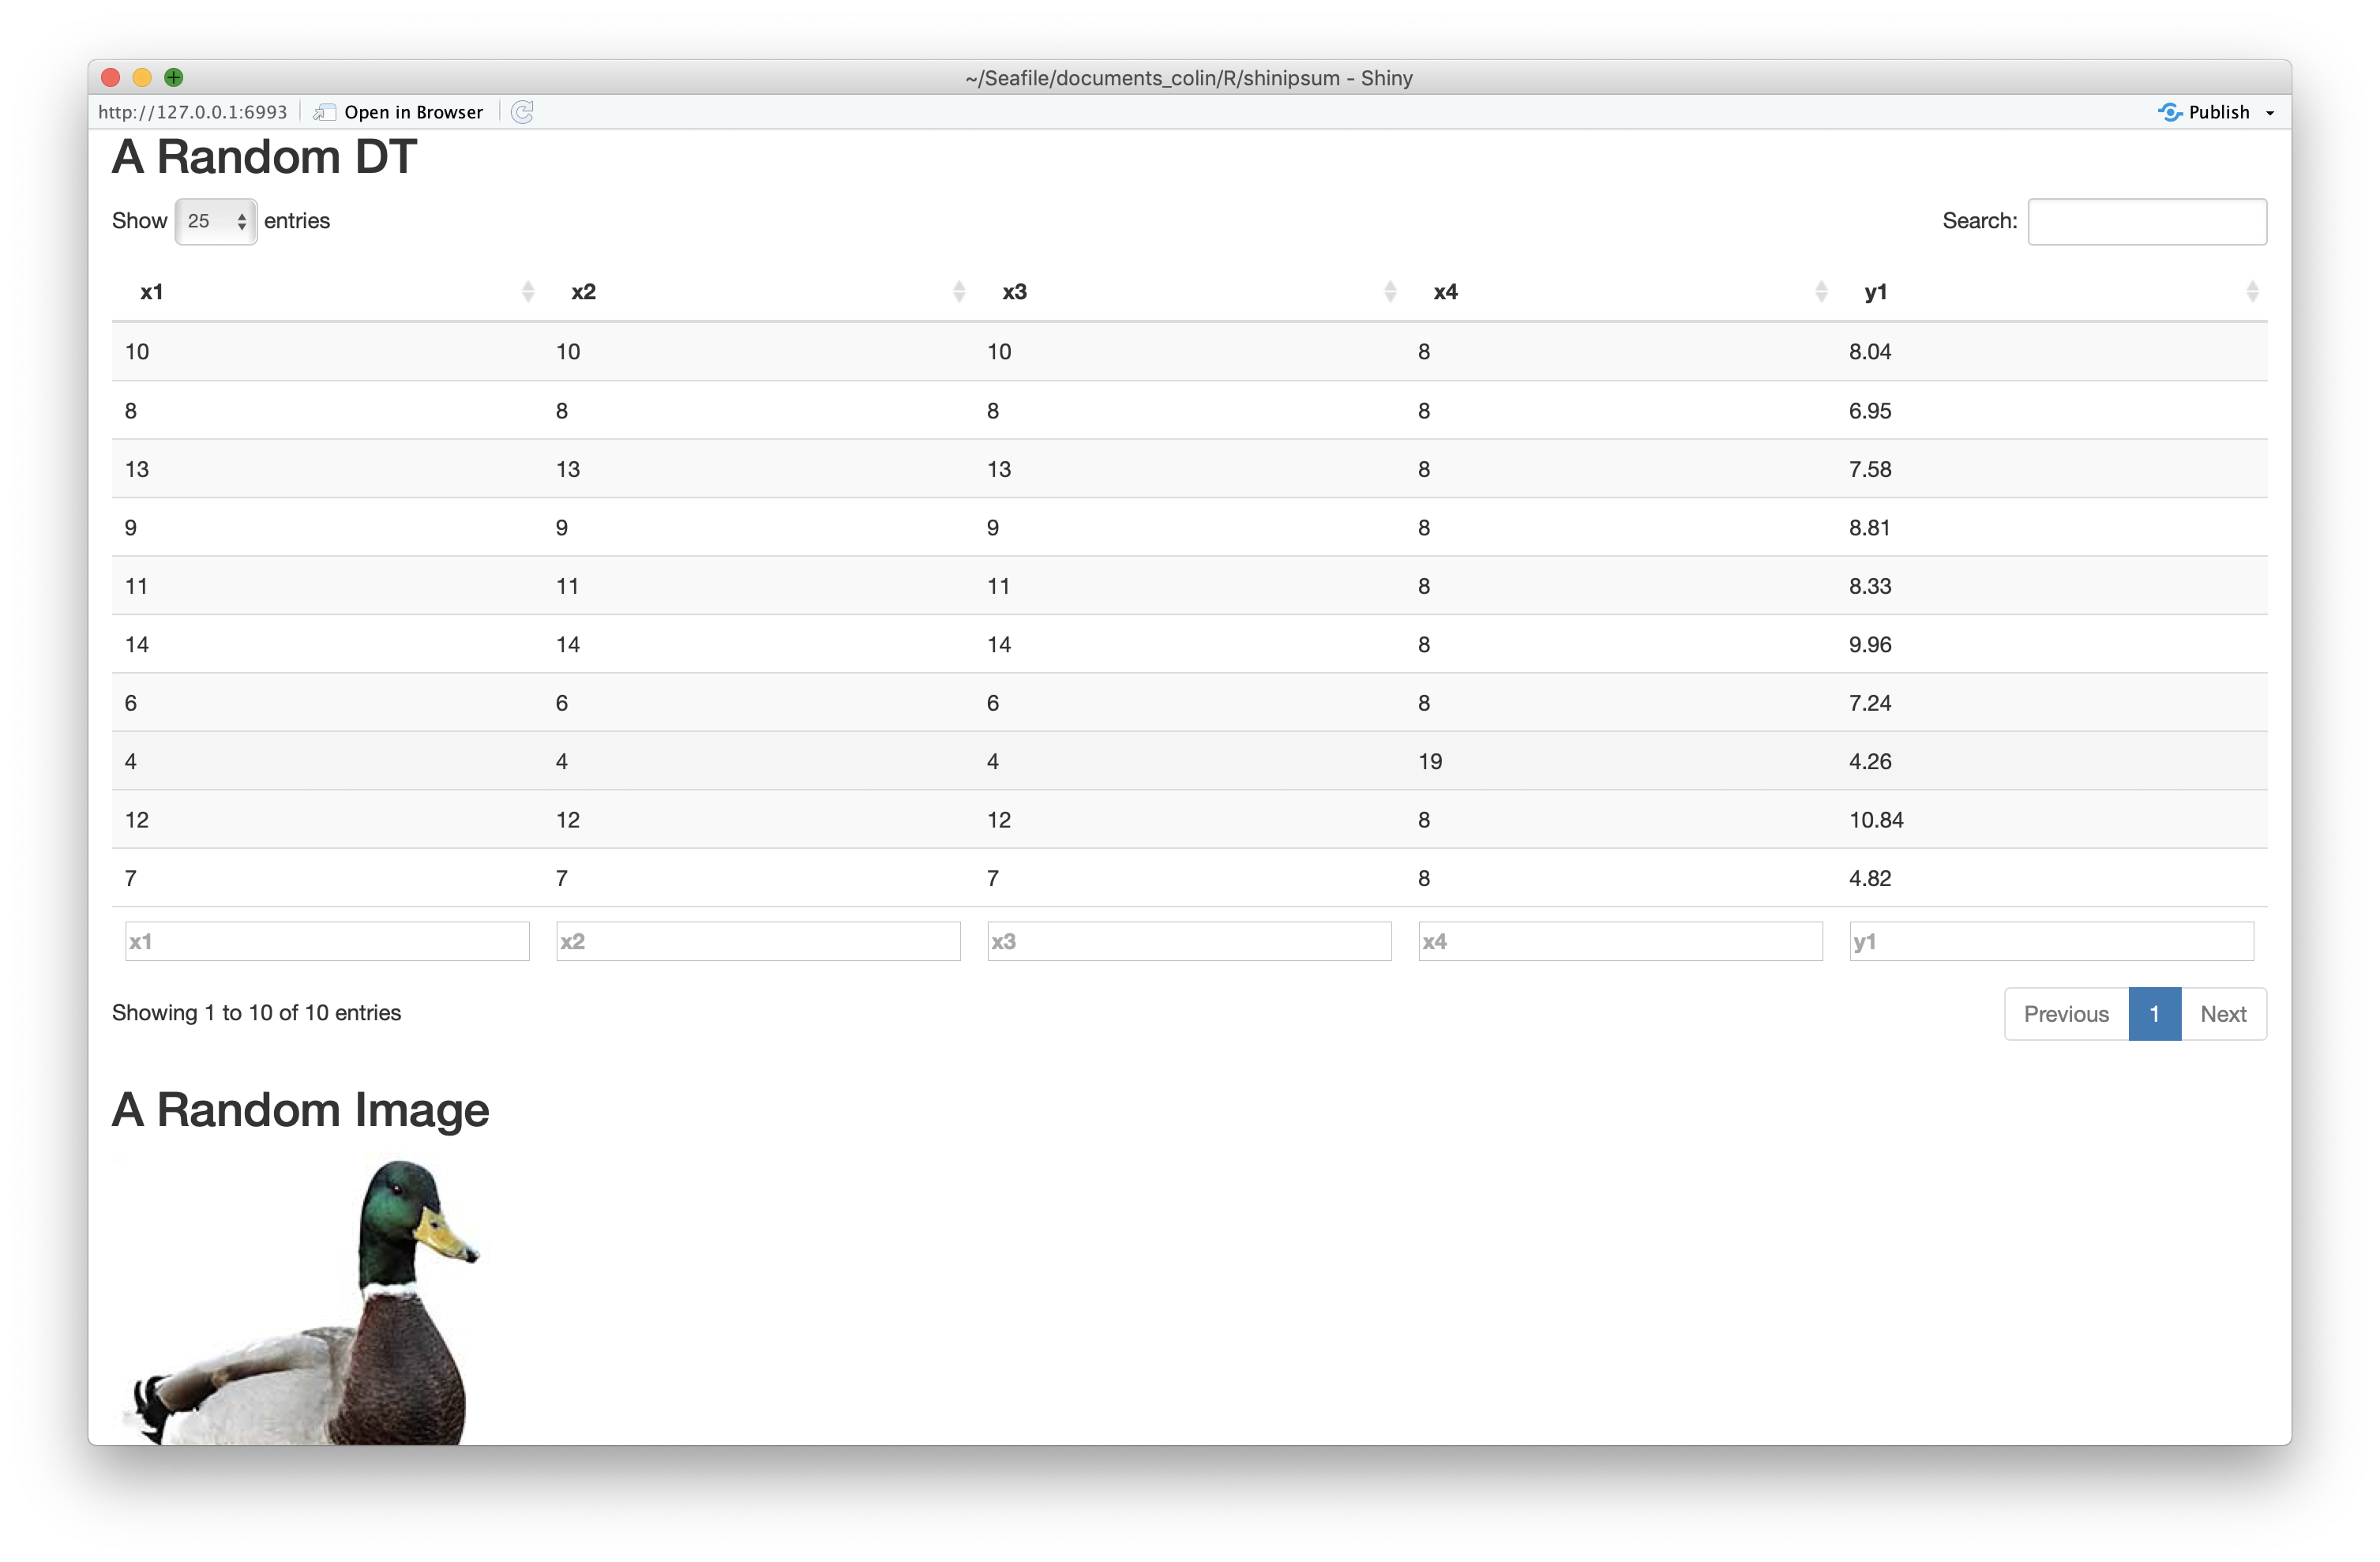
Here is an example of using {shinipsum} to generate a random app:
library(shiny)
library(shinipsum)
library(DT)
ui <- fluidPage(
  h2("A Random DT"),
  DTOutput("data_table"),
  h2("A Random Image"),
  plotOutput("image", height = "300px"),
  h2("A Random Plot"),
  plotOutput("plot"),
  h2("A Random Print"),
  verbatimTextOutput("print"),
  h2("A Random Table"),
  tableOutput("table"),
  h2("A Random Text"),
  tableOutput("text")
)

server <- function(input, output, session) {
  output$data_table <- DT::renderDT({
    random_DT(10, 5)
  })
  output$image <- renderImage({
    random_image()
  })
  output$plot <- renderPlot({
    random_ggplot()
  })
  output$print <- renderPrint({
    random_print("model")
  })
  output$table <- renderTable({
    random_table(10, 5)
  })
  output$text <- renderText({
    random_text(nwords = 50)
  })
}
shinyApp(ui, server)

Code of Conduct
Please note that the shinipsum project is released with a Contributor
Code of
Conduct.
By contributing to this project, you agree to abide by its terms.
Try the shinipsum package in your browser
Any scripts or data that you put into this service are public.
shinipsum documentation built on May 29, 2024, 2:30 a.m.
shinipsum 
The goal of {shinipsum}is to provide random shiny elements for easiest
shiny app prototyping, so that you can focus on building the frontend
before building the backend.
The full documentation can be found on the {pkgdown}site:
https://thinkr-open.github.io/shinipsum/
Installation
You can install the dev version of shinipsum from GitHub with:
install.packages("shinipsum")
About
You’re reading the doc about version : 0.1.1
This README has been compiled on the
Sys.time()
#> [1] "2024-02-09 15:35:39 CET"
Here are the test & coverage results :
devtools::check(quiet = TRUE)
#> ℹ Loading shinipsum
#> ── R CMD check results ──────────────────────────────────── shinipsum 0.1.1 ────
#> Duration: 17.1s
#>
#> 0 errors ✔ | 0 warnings ✔ | 0 notes ✔
covr::package_coverage()
#> shinipsum Coverage: 97.91%
#> R/example.R: 44.44%
#> R/Table.R: 96.97%
#> R/Plot.R: 99.29%
#> R/DataTable.R: 100.00%
#> R/dygraphs.R: 100.00%
#> R/Image.R: 100.00%
#> R/LinearModel.R: 100.00%
#> R/Print.R: 100.00%
#> R/Text.R: 100.00%
#> R/utils.R: 100.00%
Demo
Available examples:
library(shinipsum)
ipsum_examples()
#> [1] "01_navbar.R"
You can run {shinipsum} demos with:
shiny::runApp(
ipsum_examples("01_navbar.R")
)
Available ipsums :
Note: {shinipsum} only load functions which are necessary to its internal job. If you want to customise an output or to use a renderXX / XXOutput, you’ll need to explicitely load the packages needed (for example, if you want to customise a dygraph, a ggplot, or use ggplotly).
DataTable
random_DT takes 4 args :
nrow&ncol: number of row and columns of the tabletype: random, numeric, character, numchar - the type of the columns...: args to be passed toDT::datatable
Image
random_image returns a random image.
Plot
random_ggplot takes one arg :
type: Can be any of “random”, “point”, “bar”, “boxplot”,“col”, “tile”, “line”, “bin2d”, “contour”, “density”, “density_2d”, “dotplot”, “hex”, “freqpoly”, “histogram”, “ribbon”, “raster”, “tile”, “violin” and defines the geom of the ggplot. Default is “random”, and chooses a random geom for you.
Default theme is minimal.
As the return object is a ggplot, it can be enhanced like any other
ggplot with +.
library(ggplot2)
random_ggplot(type = "col") +
labs(title = "Random plot") +
theme_bw()
random_ggplotly calls the ggplotly function on a random_ggplot.
Dygraph
random_dygraph returns a random dygprah. It takes one arg:
...: arguments which are passed to thedygraph()function.
As the return object is a dygraph, it can be enhanced like any other
dygraph.
library(dygraphs)
random_dygraph() %>%
dyRangeSelector()
random_print takes one arg:
type: can be any of"character", "numeric", "model", "table", and defines the type of print. Default is"character".
Table
random_table takes three args : nrow, ncols and type. See
random_DT.
Text
random_text takes one of these two args:
nchar: lorem ipsum ofncharcharactersnwords: lorem ipsum ofnwordscharactersoffset: number of characters or words to offset the result by
Lm
random_lm returns a random lm model output:
nobs: Number of observationsnx: Number of variables (should be lower thannobs)
Example
Here is an example of using {shinipsum} to generate a random app:
library(shiny)
library(shinipsum)
library(DT)
ui <- fluidPage(
h2("A Random DT"),
DTOutput("data_table"),
h2("A Random Image"),
plotOutput("image", height = "300px"),
h2("A Random Plot"),
plotOutput("plot"),
h2("A Random Print"),
verbatimTextOutput("print"),
h2("A Random Table"),
tableOutput("table"),
h2("A Random Text"),
tableOutput("text")
)
server <- function(input, output, session) {
output$data_table <- DT::renderDT({
random_DT(10, 5)
})
output$image <- renderImage({
random_image()
})
output$plot <- renderPlot({
random_ggplot()
})
output$print <- renderPrint({
random_print("model")
})
output$table <- renderTable({
random_table(10, 5)
})
output$text <- renderText({
random_text(nwords = 50)
})
}
shinyApp(ui, server)

Code of Conduct
Please note that the shinipsum project is released with a Contributor Code of Conduct. By contributing to this project, you agree to abide by its terms.
Try the shinipsum package in your browser
Any scripts or data that you put into this service are public.
Add the following code to your website.
For more information on customizing the embed code, read Embedding Snippets.
