Nothing
In rfigshare: An R Interface to 'figshare'
Getting Started with rfigshare

Obtaining your API keys
Note that there is a nice video introduction to creating applications for the API on the figshare blog. The following tutorial provides a simple walkthrough of how to go about getting your figshare API keys set up so that you can use the rfigshare package.
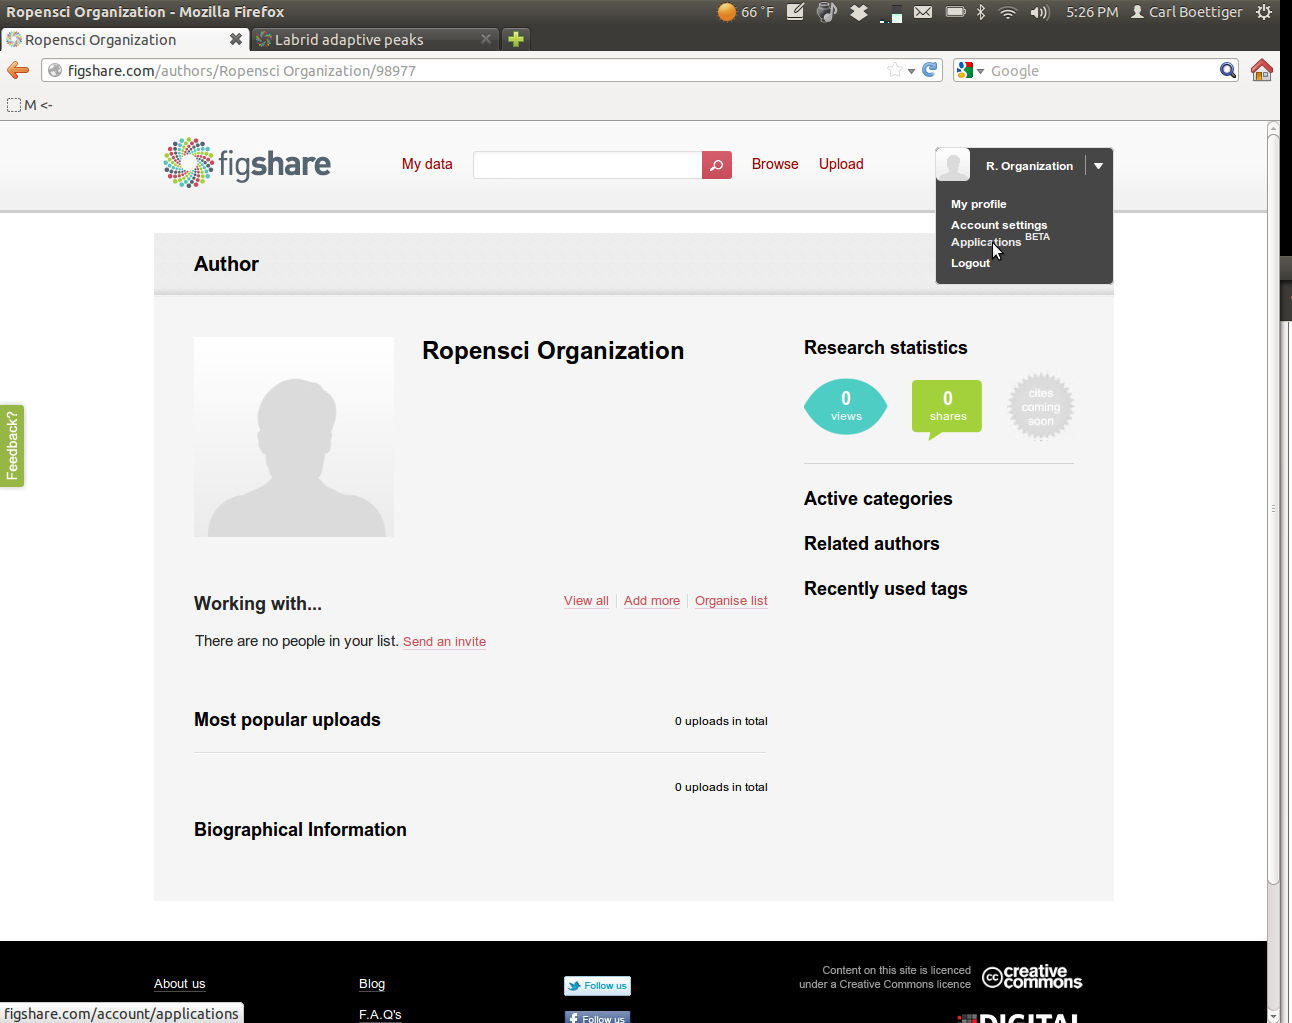
Create a user account on FigShare and log in. From your homepage, select "Applications" from the drop-down menu,
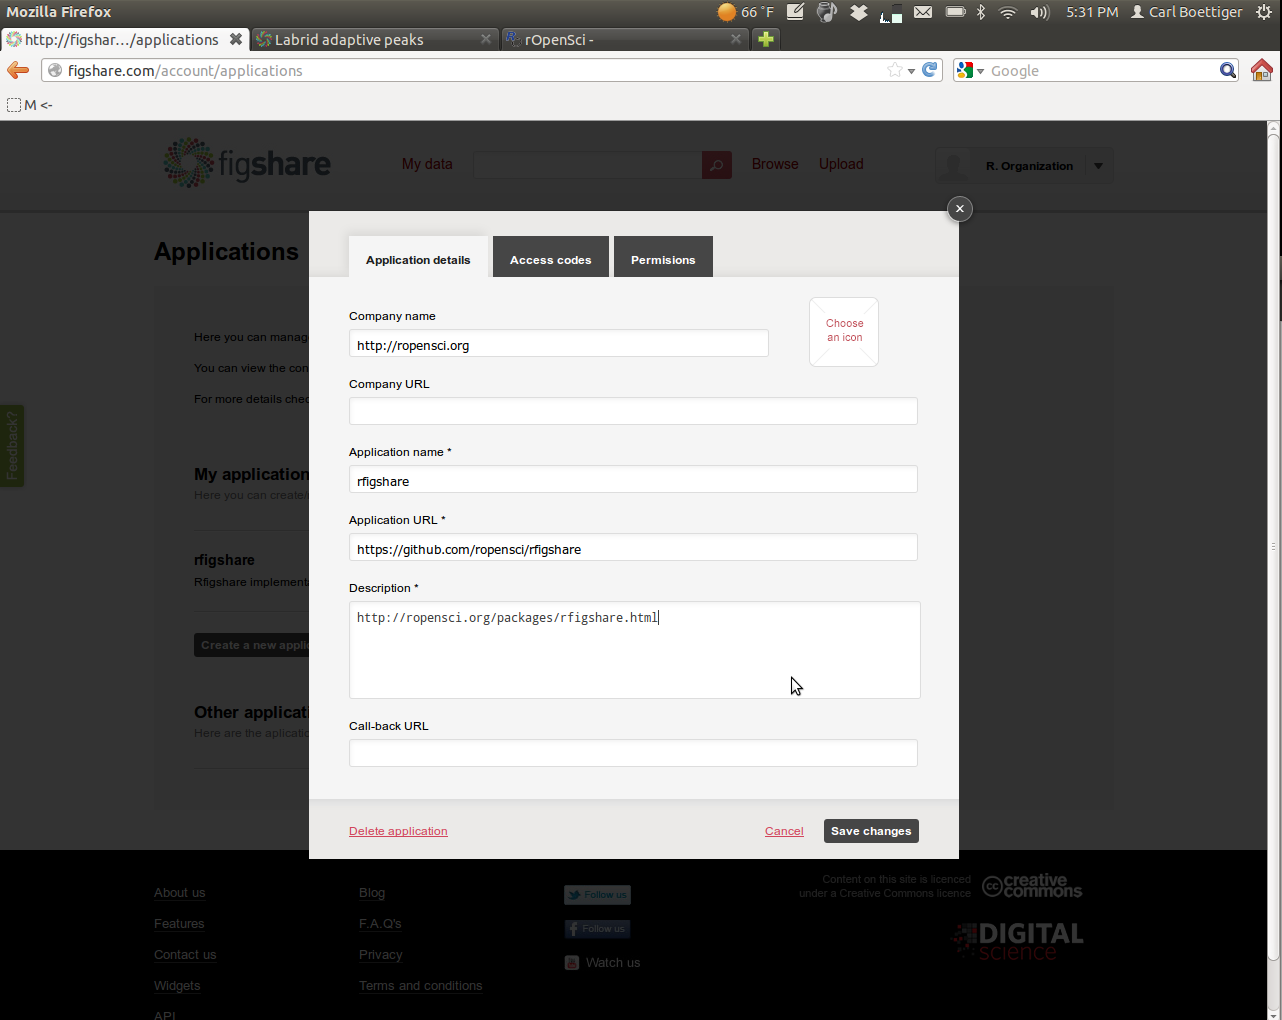
Create a new application:

Enter in the following information:
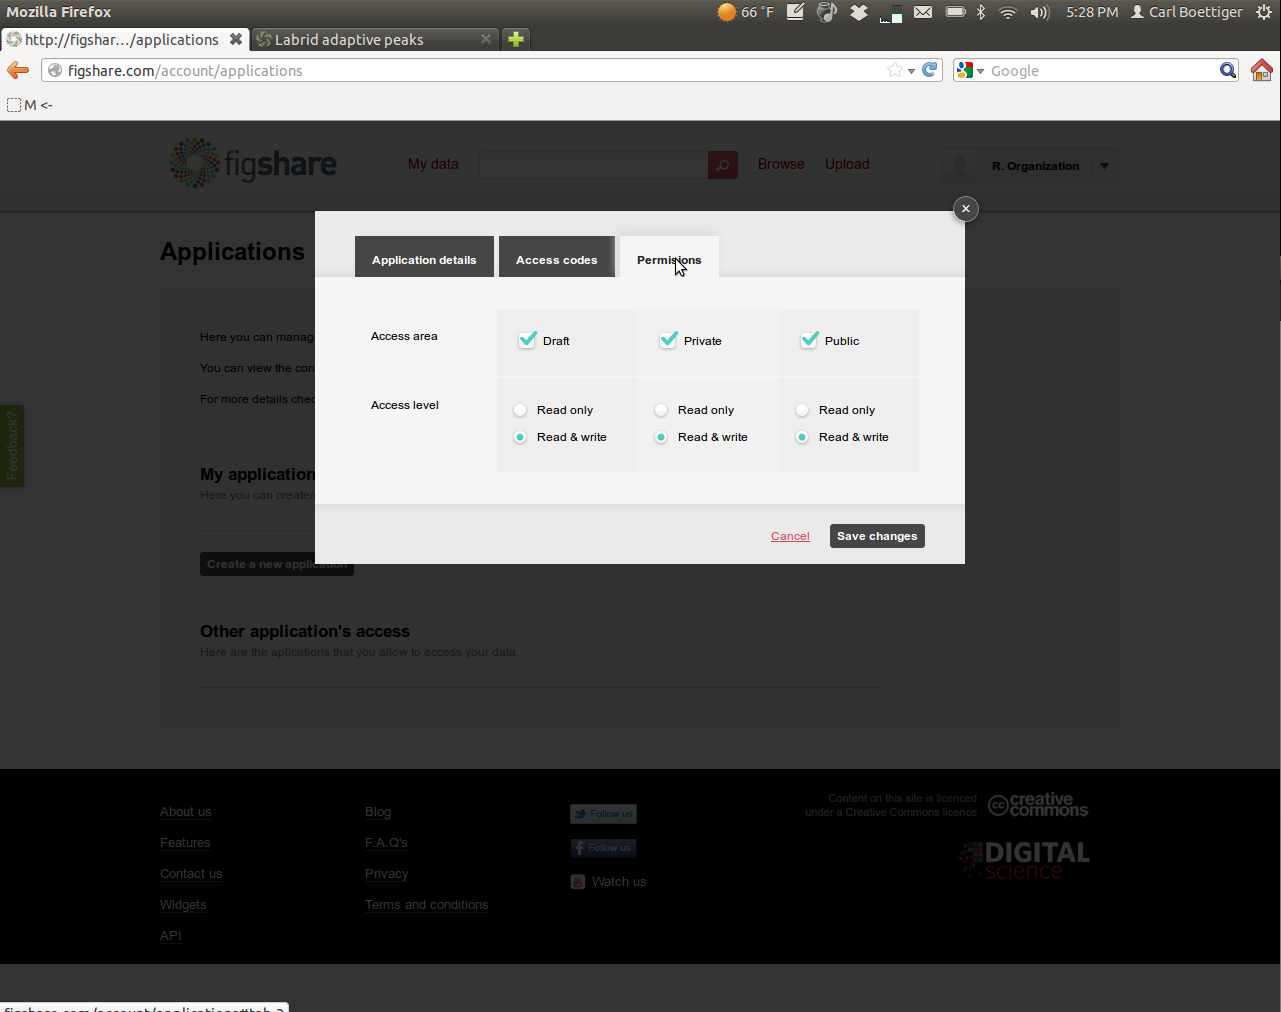
Then navigate over to the permissions tab. To get the most out of rfigshare you'll want to enable all permissions:
Save the new settings, and then open the application again (View/Edit menu) and click on the "Access Codes" tab.

Record each if the keys into R as follows. You might want to put this bit of R code into your .Rprofile to avoid entering it each time in the future:
options(FigshareKey = "qMDabXXXXXXXXXXXXXXXXX")
options(FigsharePrivateKey = "zQXXXXXXXXXXXXXXXXXXXX")
options(FigshareToken = "SrpxabQXXXXXXXXXXXXXXXXXXXXXXXXXXXXXXXXXXXXXXXXXXXXXXXXXXXXXXXXXXX")
options(FigsharePrivateToken = "yqXXXXXXXXXXXXXXXXXXXX")
That's it! You are now ready to start using figshare. Recall you can install the package directly from Github using:
require(devtools)
install_github("rfigshare", "ropensci")
Try authenticating with your credentials:
``` {r }
require(rfigshare)
fs_auth()
Try a search for an author, or get the details on a paper:

``` {r }
fs_author_search("Boettiger")
fs_details("138")
Try creating your own content:
``` {r }
fs_create("Test title", "description of test", "dataset")
````
This creates an article with the essential metadata information. In the next tutorial, Publishing on FigShare from R we will describe how to add files, tags, categories, authors, and links to your draft, and then publish it either privately or publicly.
Try the rfigshare package in your browser
Any scripts or data that you put into this service are public.
rfigshare documentation built on May 10, 2022, 1:05 a.m.
R Package Documentation
Browse R Packages
We want your feedback!
Note that we can't provide technical support on individual packages. You should contact the package authors for that.
Getting Started with rfigshare
Obtaining your API keys
Note that there is a nice video introduction to creating applications for the API on the figshare blog. The following tutorial provides a simple walkthrough of how to go about getting your figshare API keys set up so that you can use the rfigshare package.
Create a user account on FigShare and log in. From your homepage, select "Applications" from the drop-down menu,
Create a new application:
Enter in the following information:
Then navigate over to the permissions tab. To get the most out of rfigshare you'll want to enable all permissions:
Save the new settings, and then open the application again (View/Edit menu) and click on the "Access Codes" tab.
Record each if the keys into R as follows. You might want to put this bit of R code into your .Rprofile to avoid entering it each time in the future:
options(FigshareKey = "qMDabXXXXXXXXXXXXXXXXX") options(FigsharePrivateKey = "zQXXXXXXXXXXXXXXXXXXXX") options(FigshareToken = "SrpxabQXXXXXXXXXXXXXXXXXXXXXXXXXXXXXXXXXXXXXXXXXXXXXXXXXXXXXXXXXXX") options(FigsharePrivateToken = "yqXXXXXXXXXXXXXXXXXXXX")
That's it! You are now ready to start using figshare. Recall you can install the package directly from Github using:
require(devtools) install_github("rfigshare", "ropensci")
Try authenticating with your credentials:
``` {r } require(rfigshare) fs_auth()
Try a search for an author, or get the details on a paper:
``` {r }
fs_author_search("Boettiger")
fs_details("138")
Try creating your own content:
``` {r } fs_create("Test title", "description of test", "dataset") ````
This creates an article with the essential metadata information. In the next tutorial, Publishing on FigShare from R we will describe how to add files, tags, categories, authors, and links to your draft, and then publish it either privately or publicly.
Try the rfigshare package in your browser
Any scripts or data that you put into this service are public.
R Package Documentation
Browse R Packages
We want your feedback!
Note that we can't provide technical support on individual packages. You should contact the package authors for that.
Embedding an R snippet on your website
Add the following code to your website.
For more information on customizing the embed code, read Embedding Snippets.