In marionlouveaux/cellviz3d: Tools for 3D/4D interactive visualization of cells and biological tissues
knitr::opts_chunk$set(
  collapse = TRUE,
  comment = "#>",
  fig.path = "man/figures/README-",
  out.width = "100%"
)


cellviz3d
The goal of {cellviz3d} is to propose visualisation of meshes created from the segmentation of 3D/4D microscopic images, and point clouds. In particular, it helps visualising meshes from MorphographX, in combination with {mgx2r}, or point clouds from the MaMuT Fiji plugin, in combination with {mamut2r}.
How to cite
To cite {cellviz3d}, call the R built-in command citation("cellviz3d").
Marion Louveaux. (2018, October 19). cellviz3d: a R package for the 3D and 4D interactive visualization of cells and biological tissues (Version v0.0.2). Zenodo. http://doi.org/10.5281/zenodo.1467416
Installation
You can install the released version of {cellviz3d} from Github with:
# install.packages("devtools")
devtools::install_github("marionlouveaux/cellviz3d")
# With vignettes
devtools::install_github("marionlouveaux/cellviz3d", build_vignettes = TRUE)
Full documentation with {pkgdown}
See full documentation created with {pkgdown} at https://marionlouveaux.github.io/cellviz3d/
Vignette
A vignette is available in the package if you built it during installation with build_vignettes = TRUE:
vignette("cellviz3d-mgx_meshes", package = "cellviz3d"): how to build 3d interactive plots of meshes as issued from {mgx2r}
Example
The data in the example below were created with the package {mgx2r}, on the example dataset of {mgx2r}. This dataset is a timelapse recording of the development of a shoot apical meristem of the plant \emph{Arabidopsis thaliana} expressing a membrane marker. I took one 3D stack every 12h and have 5 timepoints in total. To know more about the example dataset of {mgx2r}, see help.search("mgx2r-package").
library(cellviz3d)
library(plotly)
# Read data
myMesh <- readRDS(system.file("extdata",
                              "mgx/mesh_meristem_full_T0.rds",
                              package = "cellviz3d"))

myCellGraph <- readRDS(system.file("extdata",
                                   "mgx/cellGraph_meristem_full_T0.rds",
                                   package = "cellviz3d"))
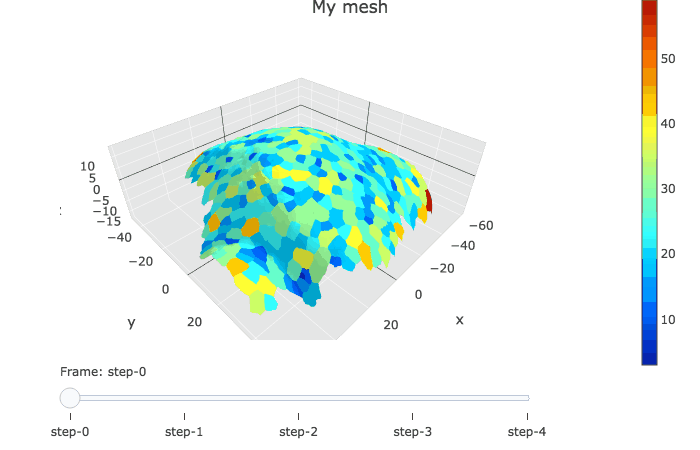
plotlyMesh() creates a plotly graph of type mesh 3D, with custom colors and custom hover information for a single mesh. Below, the mesh is displayed with one color and one cell label per biological cell. Cell label is visible when hovering over the cell center.
meshCellcenter <- myCellGraph$vertices[,c("label","x", "y", "z")]

plotlyMesh(meshExample = myMesh,
           meshColors = myMesh$allColors$Col_label,
           meshCellcenter = meshCellcenter) %>%
  layout(scene = list(aspectmode = "data"))
knitr::include_graphics("https://raw.githubusercontent.com/marionlouveaux/cellviz3d/master/inst/extdata/mgx/img/p1labels.png")
For more examples, see the vignette of {cellviz3d} and {mgx2r}.
Acknowledgements
Many thanks to @friep for her help on the plotlySpots_all() function.
Code of conduct
Please note that this project is released with a Contributor Code of Conduct. By participating in this project you agree to abide by its terms.
marionlouveaux/cellviz3d documentation built on May 20, 2019, 9:55 a.m.
R Package Documentation
Browse R Packages
We want your feedback!
Note that we can't provide technical support on individual packages. You should contact the package authors for that.
knitr::opts_chunk$set( collapse = TRUE, comment = "#>", fig.path = "man/figures/README-", out.width = "100%" )
![]()
cellviz3d
The goal of {cellviz3d} is to propose visualisation of meshes created from the segmentation of 3D/4D microscopic images, and point clouds. In particular, it helps visualising meshes from MorphographX, in combination with {mgx2r}, or point clouds from the MaMuT Fiji plugin, in combination with {mamut2r}.
How to cite
To cite {cellviz3d}, call the R built-in command citation("cellviz3d").
Marion Louveaux. (2018, October 19). cellviz3d: a R package for the 3D and 4D interactive visualization of cells and biological tissues (Version v0.0.2). Zenodo. http://doi.org/10.5281/zenodo.1467416
Installation
You can install the released version of {cellviz3d} from Github with:
# install.packages("devtools") devtools::install_github("marionlouveaux/cellviz3d") # With vignettes devtools::install_github("marionlouveaux/cellviz3d", build_vignettes = TRUE)
Full documentation with {pkgdown}
See full documentation created with {pkgdown} at https://marionlouveaux.github.io/cellviz3d/
Vignette
A vignette is available in the package if you built it during installation with build_vignettes = TRUE:
vignette("cellviz3d-mgx_meshes", package = "cellviz3d"): how to build 3d interactive plots of meshes as issued from {mgx2r}
Example
The data in the example below were created with the package {mgx2r}, on the example dataset of {mgx2r}. This dataset is a timelapse recording of the development of a shoot apical meristem of the plant \emph{Arabidopsis thaliana} expressing a membrane marker. I took one 3D stack every 12h and have 5 timepoints in total. To know more about the example dataset of {mgx2r}, see help.search("mgx2r-package").
library(cellviz3d) library(plotly)
# Read data myMesh <- readRDS(system.file("extdata", "mgx/mesh_meristem_full_T0.rds", package = "cellviz3d")) myCellGraph <- readRDS(system.file("extdata", "mgx/cellGraph_meristem_full_T0.rds", package = "cellviz3d"))
plotlyMesh() creates a plotly graph of type mesh 3D, with custom colors and custom hover information for a single mesh. Below, the mesh is displayed with one color and one cell label per biological cell. Cell label is visible when hovering over the cell center.
meshCellcenter <- myCellGraph$vertices[,c("label","x", "y", "z")] plotlyMesh(meshExample = myMesh, meshColors = myMesh$allColors$Col_label, meshCellcenter = meshCellcenter) %>% layout(scene = list(aspectmode = "data"))
knitr::include_graphics("https://raw.githubusercontent.com/marionlouveaux/cellviz3d/master/inst/extdata/mgx/img/p1labels.png")
For more examples, see the vignette of {cellviz3d} and {mgx2r}.
Acknowledgements
Many thanks to @friep for her help on the plotlySpots_all() function.
Code of conduct
Please note that this project is released with a Contributor Code of Conduct. By participating in this project you agree to abide by its terms.
R Package Documentation
Browse R Packages
We want your feedback!
Note that we can't provide technical support on individual packages. You should contact the package authors for that.
Embedding an R snippet on your website
Add the following code to your website.
For more information on customizing the embed code, read Embedding Snippets.