In ropenscilabs/miner: Control Minecraft with RaspberryJuice API
knitr::opts_chunk$set(echo = TRUE)
Introduction
The miner package provides a simple interface to the Minecraft world. Use R functions
to connect with a Minecraft server and control the world within.
The purpose of this package is to teach new programmers about R. See the effect of
your R programs directly in Minecraft!
Installation
To install this package:
# install.packages("remotes")
library(remotes)
install_github('kbroman/miner')
To use the package you will need to:
- Install a Minecraft server
- Install a Minecraft client (the Minecraft game)
- Connect to the Minecraft server from R
library(miner)
mc_connect('52.1.2.3') ## use your server IP address here, or 127.0.0.1 if installed locally
Full installation instructions are provided in the online book, R
programming with Minecraft.
About Minecraft
Minecraft is a virtual world, arranged as a 3-D grid of blocks of various materials
(air, wood, stone, etc) and populated by players, animals and monsters. The state of
the world is maintained by a shared Minecraft server, and players explore and interact
with the shared world using a local Minecraft client.
For the server, we installed Spigot, an open-source
Minecraft server, on a virtual machine. (See the section
"Details on setting up a Minecraft Server", below.) The R functions in this package
connect with the server and modify the game world.
For the client, you will need to purchase and install Minecraft on
your local PC or Mac machine. Note: this package will not work with Pocket Minecraft on mobile
devices/tablets, or with the Windows 10 version of Minecraft found in the Windows Store.
Your first miner adventure
Once you have a Minecraft server set up, here are some commands you can try. Use your Minecraft
client to observe the changes these commands make to the world.
First, connect to the world. For this you will need to know the IP address of your server.
mc_connect("52.168.1.2") # use the IP of your server here
To check you have successfully connected to the world, you can try chatting. You should
see this message appear in the feed in the Minecraft client.
chatPost("Hello, Minecraft!")
Each player in the world gets a "player ID"", and you'll need to know the player ID to manipulate
players. If you're the only player in the world, the player ID is
easy to find. But if there are multiple players, the easiest way to find your ID is
to sign out of the server and then sign in again. Your player ID will then be the last
one on the list returned by getPlayerIds.
myid <- tail(getPlayerIds(),1)
An alternative way of getting the player ID without the need to log out, using the chat window and an R script, see the mc_whoami function in the related craft package.
Once you have a Player ID, you can move the player around. Note that in Minecraft, "x"
is the East/West axis, "z" is the North/South axis, and "y" is the vertical axis.
myloc <- getPlayerPost(myid)
setPlayerPos(myloc[1]+1,myloc[2],myloc[3],player_id=myid)  # move player 1 tile East
setPlayerPos(myloc[1],myloc[2]+50,myloc[3],player_id=myid) # raise player 50 tiles in the air
You can also modify the game world. For example, this adds a diamond block near the player.
myloc <- getPlayerPos(myid)
setBlock(myloc[1]+1, myloc[2], myloc[3], 57, 1)
Overview of miner commands
General functions for connecting to the game world:
mc_connect: Connect to a Minecraft serverchatPost: Make a chat message appear to players in their clientsgetChatPosts: Retrieve the most recent chat messagemc_close: Close the connection to the Minecraft server
Functions for interacting with player location and direction (the angle of their gaze).
Note that in Minecraft, x is East, y is Up and z is South, and the unit is one block.
(A block is a 1-unit cube.) The player figure is about 2 units tall.
getPlayerIds: Get a list of players in the worldgetPlayerPos: Find the position of a specified playergetPlayerDirection: Get a unit vector representing player directiongetPlayerRotation: Return the angle of the player's direction in the x-z planegetPlayerPitch: Return the up/down angle of the player's directionsetPlayerPos: Teleport a player to a specified location
Functions for interacting with the Minecraft world.
getHeight: Find the height of the world (the y value of the highest non-air point)
at a given x-z locationgetBlock: Return the type of block (air, wood etc) in a given location, as a code. See the
provided data frame mc_items for a list of blocks and item codes.setBlock: change the block type at a given location. Use this to place items in the world.getBlocks: Return the block types in a rectangular region, as a 3-dimensional array.setBlocks: Fill a rectangular region with a specific block typegetBlockHits: Return the locations of blocks recently struck by a player's iron sword
Additional commands were added in later versions of the API:
getPlayerName: get the name of the particular player with a
particular IDgetPlayerId: get the numeric ID for a player, given their name.getEntityTypes: get a data frame of the available entity types
(with columns id and name).spawnEntity: spawn a particular entity at a specific position.setPlayerRotation, setPlayerPitch, setPlayerDirection: like
the corresponding get functions, but for setting a player's
orientation.
Suggestions for writing your own programs with miner
Using the commands above, you can write programs in R to create structures in the game world,
manipulate players, or even have the game world react to actions players take. Here are
some things you can try (in some cases, with links to examples showing how).
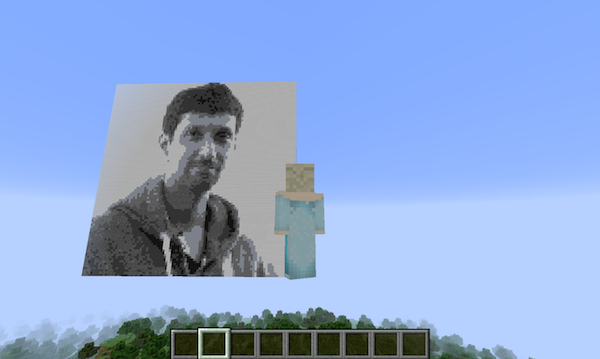
- Take an image (like a photo or
logo),
and create a wall (like this) in Minecraft that looks like the image.
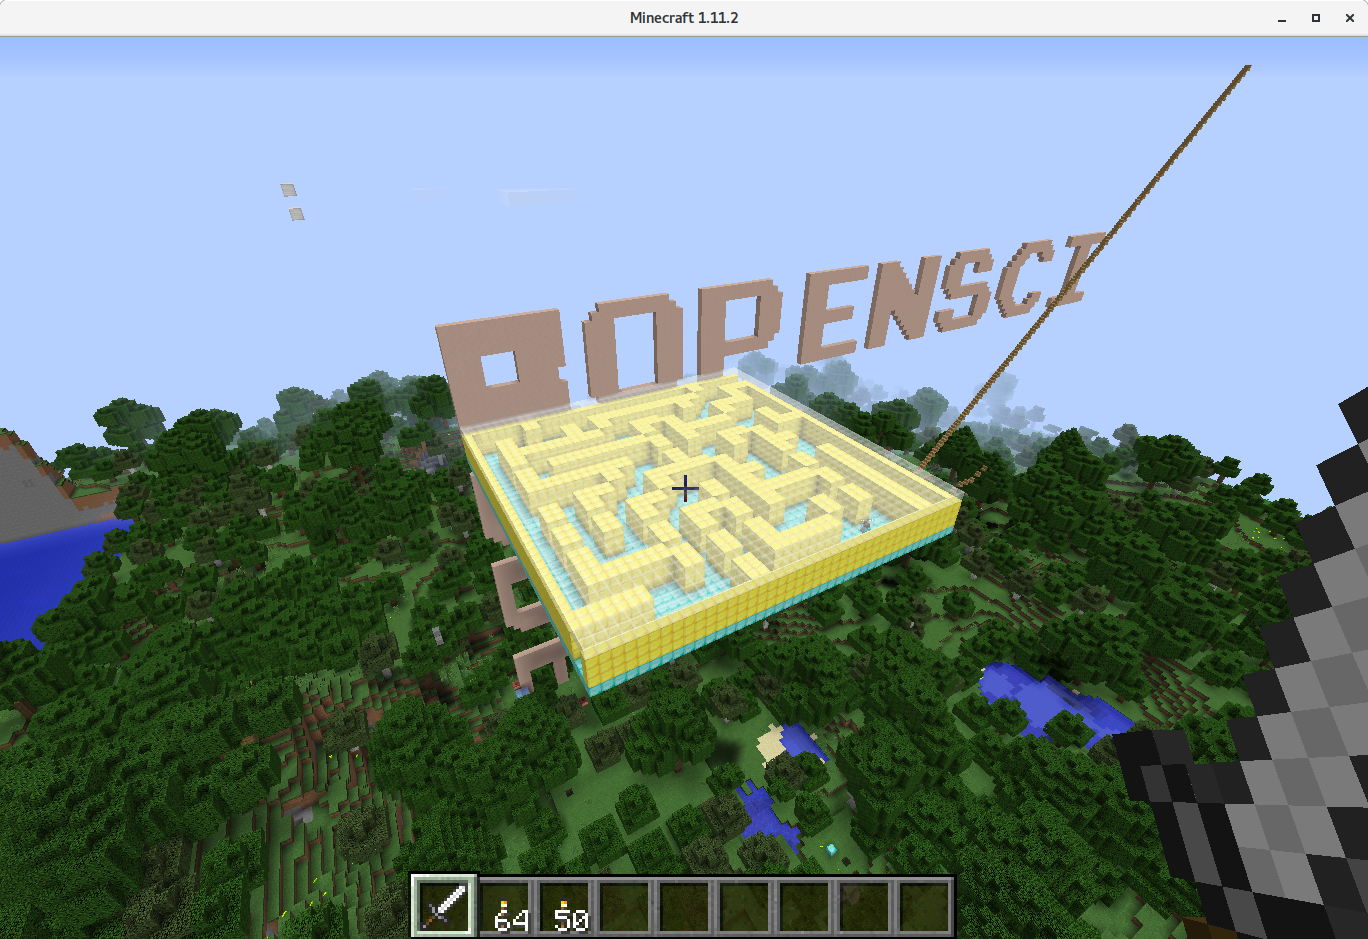
- Build a random
maze
(like this) to explore in Minecraft.
- Create a
staircase or
tower programatically.
- Make it possible to run over water, by having ice appear wherever water touches
the player's feet
(like in this video.)
- Track the player's actions to have them plant flowers
or build an ice tower.
- Write a bot to play a game with players over chat or
evaluate R commands.
Many of these features have been integrated into the companion
package, craft. We are also
preparing an ebook, R programming with
Minecraft, which
discusses these activities, and a few others, in more detail.
Details on Setting up a Minecraft server
We have tested this package using Spigot installed on an Ubuntu 16.04 virtual machine, and created a Docker image after all that you can easily deploy in your environment.
Note, that you may need to open ports on the Minecraft server and firewall to allow R and game clients to connect with it.
You probably want to configure the server to run in Creative mode, so edit the server.properties file as below:
force-gamemode=true
gamemode=1
difficulty=0
motd=My very own minecraft server
Further installation details are provided in the ebook, R programming
with Minecraft.
Acknowledgments and References
Many of the ideas and techniques in this package were adapted from
"Learn to program with Minecraft" by Craid Richardson (No Starch Press, 2016).
ropenscilabs/miner documentation built on Jan. 21, 2021, 7:23 p.m.
R Package Documentation
Browse R Packages
We want your feedback!
Note that we can't provide technical support on individual packages. You should contact the package authors for that.
knitr::opts_chunk$set(echo = TRUE)
Introduction
The miner package provides a simple interface to the Minecraft world. Use R functions to connect with a Minecraft server and control the world within.
The purpose of this package is to teach new programmers about R. See the effect of your R programs directly in Minecraft!
Installation
To install this package:
# install.packages("remotes") library(remotes) install_github('kbroman/miner')
To use the package you will need to:
- Install a Minecraft server
- Install a Minecraft client (the Minecraft game)
- Connect to the Minecraft server from R
library(miner) mc_connect('52.1.2.3') ## use your server IP address here, or 127.0.0.1 if installed locally
Full installation instructions are provided in the online book, R programming with Minecraft.
About Minecraft
Minecraft is a virtual world, arranged as a 3-D grid of blocks of various materials (air, wood, stone, etc) and populated by players, animals and monsters. The state of the world is maintained by a shared Minecraft server, and players explore and interact with the shared world using a local Minecraft client.
For the server, we installed Spigot, an open-source Minecraft server, on a virtual machine. (See the section "Details on setting up a Minecraft Server", below.) The R functions in this package connect with the server and modify the game world.
For the client, you will need to purchase and install Minecraft on your local PC or Mac machine. Note: this package will not work with Pocket Minecraft on mobile devices/tablets, or with the Windows 10 version of Minecraft found in the Windows Store.
Your first miner adventure
Once you have a Minecraft server set up, here are some commands you can try. Use your Minecraft client to observe the changes these commands make to the world.
First, connect to the world. For this you will need to know the IP address of your server.
mc_connect("52.168.1.2") # use the IP of your server here
To check you have successfully connected to the world, you can try chatting. You should see this message appear in the feed in the Minecraft client.
chatPost("Hello, Minecraft!")
Each player in the world gets a "player ID"", and you'll need to know the player ID to manipulate
players. If you're the only player in the world, the player ID is
easy to find. But if there are multiple players, the easiest way to find your ID is
to sign out of the server and then sign in again. Your player ID will then be the last
one on the list returned by getPlayerIds.
myid <- tail(getPlayerIds(),1)
An alternative way of getting the player ID without the need to log out, using the chat window and an R script, see the mc_whoami function in the related craft package.
Once you have a Player ID, you can move the player around. Note that in Minecraft, "x" is the East/West axis, "z" is the North/South axis, and "y" is the vertical axis.
myloc <- getPlayerPost(myid) setPlayerPos(myloc[1]+1,myloc[2],myloc[3],player_id=myid) # move player 1 tile East setPlayerPos(myloc[1],myloc[2]+50,myloc[3],player_id=myid) # raise player 50 tiles in the air
You can also modify the game world. For example, this adds a diamond block near the player.
myloc <- getPlayerPos(myid) setBlock(myloc[1]+1, myloc[2], myloc[3], 57, 1)
Overview of miner commands
General functions for connecting to the game world:
mc_connect: Connect to a Minecraft serverchatPost: Make a chat message appear to players in their clientsgetChatPosts: Retrieve the most recent chat messagemc_close: Close the connection to the Minecraft server
Functions for interacting with player location and direction (the angle of their gaze).
Note that in Minecraft, x is East, y is Up and z is South, and the unit is one block.
(A block is a 1-unit cube.) The player figure is about 2 units tall.
getPlayerIds: Get a list of players in the worldgetPlayerPos: Find the position of a specified playergetPlayerDirection: Get a unit vector representing player directiongetPlayerRotation: Return the angle of the player's direction in the x-z planegetPlayerPitch: Return the up/down angle of the player's directionsetPlayerPos: Teleport a player to a specified location
Functions for interacting with the Minecraft world.
getHeight: Find the height of the world (the y value of the highest non-air point) at a given x-z locationgetBlock: Return the type of block (air, wood etc) in a given location, as a code. See the provided data framemc_itemsfor a list of blocks and item codes.setBlock: change the block type at a given location. Use this to place items in the world.getBlocks: Return the block types in a rectangular region, as a 3-dimensional array.setBlocks: Fill a rectangular region with a specific block typegetBlockHits: Return the locations of blocks recently struck by a player's iron sword
Additional commands were added in later versions of the API:
getPlayerName: get the name of the particular player with a particular IDgetPlayerId: get the numeric ID for a player, given their name.getEntityTypes: get a data frame of the available entity types (with columnsidandname).spawnEntity: spawn a particular entity at a specific position.setPlayerRotation,setPlayerPitch,setPlayerDirection: like the correspondinggetfunctions, but for setting a player's orientation.
Suggestions for writing your own programs with miner
Using the commands above, you can write programs in R to create structures in the game world, manipulate players, or even have the game world react to actions players take. Here are some things you can try (in some cases, with links to examples showing how).
- Take an image (like a photo or logo), and create a wall (like this) in Minecraft that looks like the image.
- Build a random maze (like this) to explore in Minecraft.
- Create a staircase or tower programatically.
- Make it possible to run over water, by having ice appear wherever water touches the player's feet (like in this video.)
- Track the player's actions to have them plant flowers or build an ice tower.
- Write a bot to play a game with players over chat or evaluate R commands.
Many of these features have been integrated into the companion package, craft. We are also preparing an ebook, R programming with Minecraft, which discusses these activities, and a few others, in more detail.
Details on Setting up a Minecraft server
We have tested this package using Spigot installed on an Ubuntu 16.04 virtual machine, and created a Docker image after all that you can easily deploy in your environment.
Note, that you may need to open ports on the Minecraft server and firewall to allow R and game clients to connect with it.
You probably want to configure the server to run in Creative mode, so edit the server.properties file as below:
force-gamemode=true gamemode=1 difficulty=0 motd=My very own minecraft server
Further installation details are provided in the ebook, R programming with Minecraft.
Acknowledgments and References
Many of the ideas and techniques in this package were adapted from "Learn to program with Minecraft" by Craid Richardson (No Starch Press, 2016).
R Package Documentation
Browse R Packages
We want your feedback!
Note that we can't provide technical support on individual packages. You should contact the package authors for that.
Embedding an R snippet on your website
Add the following code to your website.
For more information on customizing the embed code, read Embedding Snippets.